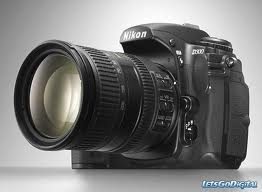
We have been discussing modern cameras recently, all bristling with settings, modes, applications and operating systems. However, despite all the electronic trickery, there are some basic (non-electronic) items needed to make a good photograph. Let me assure you that “apps” do not have the photographer’s eye. You do!
I should not have to point this out, but the prime advantage of any digital camera is instant review of your photographs. You know immediately if you got an image – but that does not actually mean that you have a good photograph, does it? However, if you look critically at the shot you have just taken, you will be able to work out how to make it a better shot, won’t you?

Since photography is accepted as ‘painting with light’, you should look to see if your shot is well exposed, too light, or too dark and then make the necessary compensation before shooting again. Sound too difficult? It is not.
If you have just shot in poor light, then just activate the flash. Problem solved. If the camera’s light meter was fooled by strong back lighting, then this is no problem either. Just about all half decent digitals have a ‘back light compensation’ setting. Use it. Problem solved.
However, there is another way around these problems and that is called ‘bracketing’. Many digital cameras, especially SLR digitals, have this function. With mine I have set it up to give me three automatically bracketed shots, each half a stop different. One below the presumed correct setting and one above. This gives me three shots to review, and 99 times out of 100, one of those three will be the best exposure. This maneuver I used to do manually with my Nikons. With my digital camera, I have it permanently set to do this for me. ‘Professional’ photography tips available to the digital photographer.
Another ‘pro’ tip is in the placement of the subject in the frame. We know that the most pleasant visual effect is when the subject is not bang in the middle, but off center. Simply make sure the subject is one third in from either edge of the viewfinder. Just by placing your subject off-center immediately drags your shot out of the “ordinary” basket. The technocrats call this the “Rule of Thirds”. While still on the Rule of Thirds, don’t have the horizon slap bang in the center of the picture either. Put it one third from the top or one third from the bottom. As a rough rule of thumb, if the sky is interesting put more of it in the picture, but if it is featureless blue or grey include less of it. Simple!
Now, many digital cameras have an optional grid you can have in the viewfinder, with just a push of a button and a selection from the digital menu. This grid automatically shows you whether your horizon is level and where it is in the photo – one third down from the top, or one third up from the bottom. The grid also shows you exactly where to place your subject – at the intersection of thirds. In my early digital days I would have to hand draw the grid on the focusing screen. Now the digital camera does it for me.
Now, before we leave composition, always take two shots, one in the “usual” horizontal format (called “landscape”) and the second one in a vertical (portrait) format. You will be amazed just how this simple trick can give you a better picture. Landscapes taken in the vertical format make the viewer look more deeply at what the photographer is trying to say in the picture.
In attempting to get that different viewpoint you should also try to take some shots from something which is not the standard eye-level position. Lie on the floor, climb a ladder – anything! Just don’t get stuck with standard eye-level views.
Finally, walk several meters closer to the subject and fill the frame. I know you can crop later with Mr Photoshop, but you risk losing sharpness. The answer is to look very critically at your pre-view and correct deficiencies before you leave the site where you were snapping.


