 The junior photographer in the family has a Casio camera, purchased new five months ago. It suits her and the ability to rotate the LCD screen does make it easy for the ubiquitous “selfie”. Not the most expensive on the shelf, but at 16,000 baht not the cheapest either.
The ability to move the LCD to look either way, fore and aft, was a selling feature for the budding photographer, and the results she was getting were enough for her to get a byline for some of her pictures.
However, like all things, mechanical and otherwise, the camera LCD malfunctioned and became unhinged. As the camera had a 12 months warranty, we took it back to the shop where it was purchased, and where the salesman looked sage and declared, “Hinge broken.” Yes, we could see that, but now can we get it fixed. “Have to send Bangkok” and how many times do you hear that? Asking how long it would take to repair the broken hinge we were told “45 days”.
To be honest, I was quite incredulous at that. Six and a half weeks! Bangkok is only two hours from Pattaya, so even allowing one day for transport up and one day for transport down, that leaves another 43 days.
The website does not offer any advice regarding length of time for repairs in Thailand, but did indicate that in the UK, “We can usually repair most products within 7-10 working days, subject to the availability of parts and the condition of the product. If you are making a warranty claim, you will need to provide a copy of a receipt or alternative physical proof of purchase indicating a recognized retailer.”
Since I believe that Thai technicians are as good as anywhere else in the world, all the paper warfare was in place and correct, then why the difference between here, now down to 43 days and there, tops at 10 days?
I wonder if any of the readers has come across similar problems with slow service/repairs? Please let me know, before I go further. In the meantime junior photographer is counting off the 45 days.
Filters made easy
However, before rushing out to get filters, you do need to standardize your equipment. The first thing I did when I unpacked my new camera was to check the size of the lens diameter. It was 55 mm. The second thing I did was to rake through my collection of stepping rings to screw on to the end of the lens to bring the diameter up to 62 mm.
This was to make the new camera lens compatible with my box of photographic filters. The vast majority of these are 62 mm, which is a good size as it is larger than most 35 mm camera lenses, so will not produce a vignetting effect if you stack a few of them together, such as a polarizer and a +1 magnifier.
So here’s what I think you should have. The first one is called simply a Skylight 1A. This filter does make the sky a little deeper, but the main reason to have it is as a sacrificial piece of glass, so that your good, expensive lens does not get scratched. Skylight 1A’s are very cheap.
Now to use any filter. If you have an SLR (single lens reflex) camera or a digital, you actually look through the lens when you are focussing and What You See Is What You Get (the WYSIWYG principle, mentioned many times in this column).
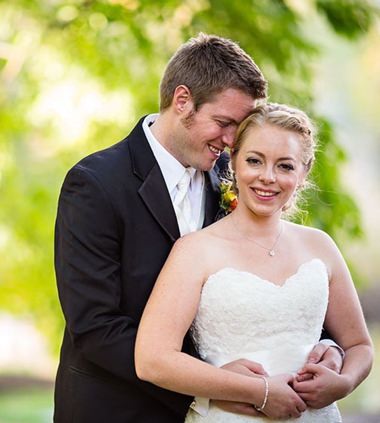
To get the wedding portrait look, get a center spot (soft focus) filter. Set your lens on the largest aperture you can (around f5.6 or f4 is fine). Focus on your subject, keeping the face in the center of the screen. Now bring up your magic soft focus filter and place it over the lens and what do you see? The face is in focus and the edges are all blurred! Try some different f stops as well (it makes the center spot larger or smaller) and record the details in your trusty notebook!
And of course, hope that nothing breaks in your new camera! Remember the 45 day rule.
 |
 |
 |


