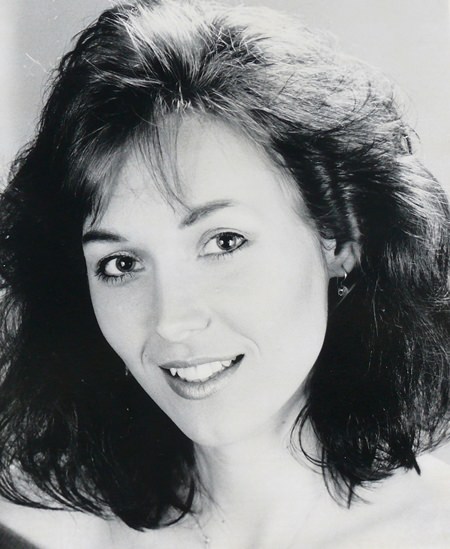
What is the commonest photo subject? Women. And more specifically, portraits of women.
Professional portraits have something about them, something which distances good portraits from average ones. And let’s not bring selfies into this discussion. When you take time to analyze a “good” portrait, you always come up with the one deciding factor – and that is lighting.
Have you ever been in a professional photographic studio? When you go into a pro’s studio, you will find that there are flash heads everywhere, with the photographer balancing the amounts of light that falls on the subject. A typical portraiture set up will have a back light to illuminate the background, another back light to highlight the subject’s hair, one light to balance the main light plus one or two reflectors, so that the final result is a well lit portrait.
To be able to achieve this you will need a minimum of four flash heads and a flash meter so you can judge the light intensity.
So here we go, how to take an excellent portrait, without thousands of baht in flash heads. In fact, it only takes one flash head, plus a large mirror. You will also need a sheet of white paper and a black reflector (which more correctly should be called an absorber).
First you have to position the model. I have written previously about this and how you must stop the model standing to attention, square on to the camera. As it will take you some time to get the lighting correct, I suggest you position the model on a chair about 45 degrees to the camera centerline and only get your model to turn her head towards the camera when you are fully set up.
So here we go with the main light, the flash head. This should be aimed (from your left) about 45 degrees from the centerline and from one meter above the head height of the model, and start with being about two meters from the model.
This will light the face much stronger on the photographer’s left and produce a dark shadow under the chin. Don’t worry, much more to go yet.
Let’s get rid of the dark shadow. This is where the sheet of white paper comes in. Get your model to hold the sheet of paper horizontally and about 30 cm below the chin. What this does is to collect any “spill” and reflect this back under the chin to get rid of that dark shadow. (It also gives the model something to do!)
Now comes the hair light. Remember I said you will need a large mirror. Place this behind and to the right of the model, and again one meter above head height. When you pop the flash, the over-spill is reflected back on to the model’s hair.
You should now take a few test shots. With a DSLR you can do this and by looking at the LCD on the back of the camera you can see if the face is getting too much light, so move the camera another meter back. Take careful note to see that the mirror itself is not in the shot. Be prepared to move the mirror hair light to give the hair as much ‘halo’ as you want.
Almost finished, but there is still the black paper to use. This should be placed close to the model’s face (on the side away from the flash head illumination) to absorb the spill and give some shadow effect to produce some 3D to the model’s face.
Now with the variables of the main light’s distance from the model, the effect from the reflected mirror hair light, the white paper under the chin and the black absorber you have the making of a very professional portrait. Try it this weekend.
One last item, this is called photogenicity, and is simply some of the most beautiful women do not photograph well, and some of the ‘plain Janes’ come up looking like a million dollars.
 |
 |
 |


