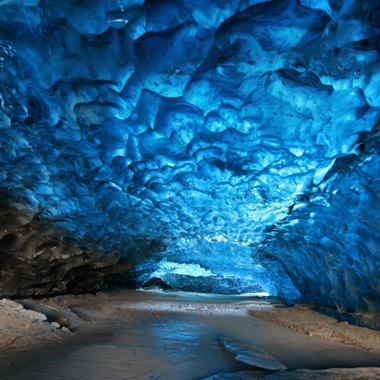
Enthusiastic photographers take dozens of photographs. Most are consigned to a CD (somewhere) or a memory stick (even easier more somewhere). However, if the photographer applies some lateral thinking there are still amazing photographs that can be taken by even the rankest amateur. And you don’t need special filters either. Or Photoshop savvy.

This week’s image is there for your taking. The next piece of good news is that you also do not need to know anything about f stops, shutter speeds, zoom lenses, reciprocity failure or the like. Any film camera will do – even a cheap point and shooter!
Please Support Pattaya Mail
This week I will show you how to get a Wow image, and you do not need any special equipment at all – other than an ‘old’ film camera. Yes, an old film camera, and most photographers have one in a drawer somewhere.
This week’s column refers very much to wall “art”. When you hang something on the wall, you want an image with ‘Wow factor’ that has an immediate effect on people. This procedure will give you that image with Wow. The end result will be such that people will say for years “How in heck did you take that? Was it a special kind of filter?”
The first step is to pop down to the photo shop and buy some slide film. Don’t worry if you haven’t got a projector, never used slide film before or any other of the excuses. If you normally used 100 ASA print film then get some 100 ASA slide film. Do not get the Kodachrome type that you have to send away for processing, just get ordinary slide film that can be processed here (generally called E6).
OK, load the camera with the slide film. (It’s just the same to load as print film – for most cameras, put in the cassette, pull the tail across and shut the back of the camera!)
The final result looks best with landscapes – include some sky, or seascapes where you include a yacht or similar close up, or a river scene, and finish the roll of film.
Now take the film back to the shop for processing and here is an important part. You ask for E6 slide processing, but do not mount the slides! Leave the slides either as a roll or cut into strips of six and put in sleeves like your usual print film negatives used to be. Impress this on the girl behind the counter. You do not want them mounted. Repeat the instructions!
When you get the slide films back, just hold them up to the light and select any one shot that you like the look of. You can choose the image in the shop even. You don’t have to be super-selective.
Now talk to the girl behind the counter, saying “I want you to print number X as if this is a negative. I know it is slide film, but I want you to print a picture, using this slide as the negative.” It will probably take quite some repeating before the technician will reluctantly take the job on, with much warnings about it will not look right, etc. Ignore all warnings, just have faith. While you are at it, tell them that you do not want the usual small size, but get an enlargement done straight off. 10″ x 8″ is sufficient and costs less than 100 baht. The photo shops generally call this size 8R. Repeat your instructions, tell them you know the color will be wrong and leave them to it.
You see, what happens with color prints is that the processing machine recognizes certain shades in the normal negative and converts that to green for grass, blue for skies, etc., in a photochemical way. By giving the auto-processor grass that is already green and skies already blue totally confuses its auto brain (and the girl in the shop usually) and it will produce a print with the wildest psychedelic colors you will ever see. Expect orange trees and yellow skies – you can get anything! It is almost impossible to predict, but the end result will have that Wow I promised you. Frame it and put on the wall.
 |
 |
 |


