Read any good book on photography and you will be reading chapters after chapters on why you need an SLR to be able to produce the kind of photographs that you see in the book. However, an SLR (or D SLR these days) is not 100 percent necessary to come up with some excellent images. You can even make your own pin-hole lenses for next to nothing, but a D SLR does make it easier.
According to Wikipedia (and I was not around to refute this), the principle of pin-hole photography was first described by Persian scientist Ibn al-Haytham (Alhazen) who wrote about naturally occurring rudimentary pinhole cameras, and that was long before Eastman-Kodak!
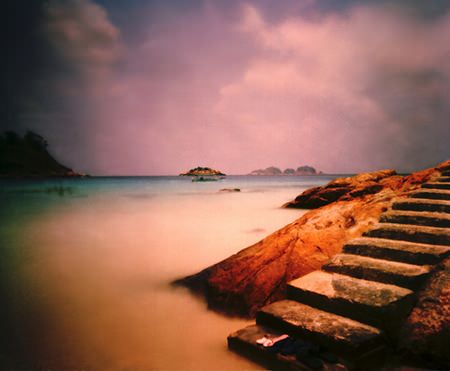
 Pinhole pic.
Alhazen published this idea in the Book of Optics in 1021 AD. He improved on the camera after realizing that the smaller the pinhole, the sharper the image (though the less light) and he provided the first clear description for construction of a camera obscura (Lat. dark chamber).
In the 13th century, Robert Grosseteste and Roger Bacon commented on the pinhole camera. Between 1000 AD and 1600 AD, men such as Ibn al-Haytham, Gemma Frisius, and Giambattista della Porta wrote on the pinhole camera, explaining why the images are upside down.
Around 1600 AD, Giambattista della Porta added a lens to the pinhole camera. But it was not until 1850 that a Scottish scientist by the name of Sir David Brewster actually took the first photograph with a pinhole camera.
The original pin-hole cameras were just light-tight boxes made of any materials you wanted, with light sensitive film on the inside back wall and a real pin-hole at the front. Exposure? A good guess was around 15 seconds, but it was trial and error. Sometimes the exposure might be measured in hours!
Today’s pin-hole cameras are much more sophisticated, but this time you do need a D SLR. Remove the expensive lens from the front of the camera and prepare your new pin-hole lens, which will cost a few baht at most.
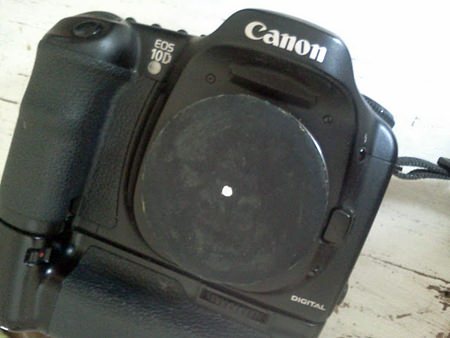
What you do is take the lens body cover and make a pin-hole in the center of it. Try to be as close to the exact center as you can. And also make the edges of the pin-hole as smooth as possible. This is best done by using a hot needle to make the hole. For a photo project, buy a few spare body caps and try different hole sizes, all of which will give you different results.
 Pinhole DSLR.
Now fit the body cap back on your camera. Set it on Auto and let the camera do the rest. Its little electronic brain will set the best shutter speed (be ready for a long exposure, so it is best to use your tripod for these shots). After taking the shot it will automatically advance, so you can take more shots by altering the shutter speed for different results. And the beauty of D SLR is that you can instantly see what result you are getting, and save the good ones. You can then even play around with the final image with Photoshop or other manipulation packages later.
On a pinhole camera there is no aperture to adjust, and it’s highly likely that your camera meter will not give you anything approaching an approximately correct reading, so if the Auto mode does not work, set your camera to Manual, ISO100, and Daylight White Balance. On a bright sunny day try 1 sec, at pre-dawn, try 30 sec. Once the sun is above the horizon, you’re likely to be in the 8 sec-range, but trial and error is the way to experiment. Take a shot, check the image, adjust exposure in the camera and try again. It is fun and a D SLR does let you do so much more than a film camera.
Do you really need an SLR? Yes, if you want to try pin-hole photography!


