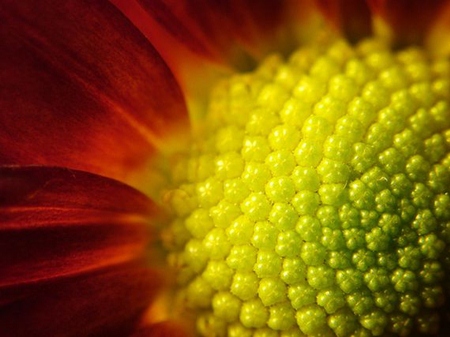
There is so much more to photography than taking pictures of young Thai women holding up two fingers and looking just as silly as all the other Thai women holding up their two fingers. At least they seem to have grown out of the V between index finger and thumb held under the chin. This week, try ‘macro’ photography.
Look at the icons on the top of your newly acquired digital camera? Does it have a thing that looks like a tulip? If so, you are on your way to macro photography.

The simple name for macro photography is ‘close-up’ photography and allows you to get much more detailed images of subject matters that are very small. Obviously one does not need macro facility to photograph an elephant, but to get the elephant’s eye and nothing else, a macro capability in your camera would make life easier (even if not for the elephant).
There are many pitfalls in macro photography, and some are financial. If you want a car that does 200 kph, it is easier to start with a Porsche than it is to start with a Corolla and then modify the engine. However, the Porsche is a lot more expensive. Likewise, true macro lenses are more expensive than ordinary ones modified to have macro capabilities.
Having said all that, it is still possible to get close-up photographs with some fairly simple equipment, with the easiest being called ‘close-up lenses’ that screw on to the front of your existing lens. These usually have numbers like +1, +2, +4. The +number refers to the diopter measurement of the lens and the higher the number, the greater the magnification possible. The diopter measurement is the reciprocal of the focal length of the lens measured in meters. Therefore a +1 diopter lens is 1 meter focal length, a +2 is 500 mm and a +4 is 250mm. These add-on lenses are available in a variety of filter sizes and qualities. If you don’t wish to get heavily involved then a set of uncoated close-up lenses to fit your favorite lens is the way to go. Coated close-up lenses cost more and will yield a better image, and two element close-up lenses (much more expensive) will give better results but you need to be a dedicated macro man.
The effect of these close-up lenses increases as you add them together. The +1 and the +2 screwed together will yield +3. However you come across another problem when you start ganging them up – the focal length gets smaller and the light that gets into the camera becomes less.
Understand that in all macro photography as the lens gets closer to the subject and the image gets larger on the electronic “film”, the light reaching it is lessened. Also the depth of field gets very shallow and to combat this, very small apertures are called for which lessens the light to the film even more. Both these things in combination mean that normal hand held exposures are usually out of the question. A tripod is needed for steadiness plus flash is needed in nearly every circumstance to give decent illumination. However, as you strive to get closer to the subject, there may not be enough distance to get the flash to light the subject. A ring flash can help here, but that is another expense.
There is another way around this and that is to use a light box. Now these can be purchased from specialized camera suppliers and do cost money, but you can make your own light box very inexpensively. The secret is a large cardboard box and some tracing paper, but go to this website and it is all explained http://www.strobist.blogspot.com/2006/07/how-to-diy-10-macro-photo-studio.html.
So there you have it. If you have a macro lens in the camera, then experiment with how close you can get to your subject. If you haven’t, then try screwing the close-up lens on the front. I find the +3 the best for my camera gear. The biggest problems are short depth of field and lighting; however, none of these are insurmountable.
Try it today, after you have built the light box! Lots of luck!


