I was speaking to a chap the other day, whose partner was an artist, and that reminded me just how difficult it is to do justice to a painting using the medium of photography.
If you are ever in an art gallery, even if you are allowed to photograph the paintings on the wall, the result is a ‘blown out’ center and dark edges. This is the same whether you are using the weeny on-board flash or a hammer head flash that can light up the other side of the moon.

You will also have a problem with lenses, firstly to ensure there is no ‘pin cushion’ effect, and then getting a wide enough lens to get all the painting in, without having to go back 20 paces. This is not an easy exercise.
Let’s deal with the lighting. You need to get flat, featureless lighting, and that is why a flash is not the answer. The ideal lighting is daylight, overcast and the painting placed so that it is at right angles to the direction of the light. Unless you are photographing at mid day, this means that you have to hold the painting at around 45 degrees from the vertical. Don’t drop it! Mid day is also not a good idea, as you and the camera will obscure much of the light falling on the painting, and you are back again to uneven lighting.
Photographing during the day does mean you are not restricted by how far away you can get from the canvas and you do get better results with a ‘portrait’ lens (say around 135 mm focal length) as you will get less distortion at that focal length.
So to recap:
Don’t bother taking photographs of paintings in an art gallery, even if allowed. Take the shots outside with flat light (open air shade is good) and keep the camera on the same plane as the light source and at 90 degrees to the canvas.
There you go – that was easy.
Another very difficult subject is wine. (And you thought I was going to say ‘children’ – also very difficult. If you do get asked to photograph somebody’s child invent a contagious disease.)
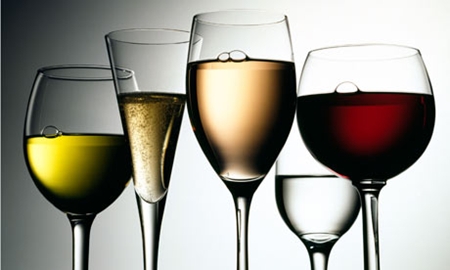
Back to wine: Restaurateurs know that it is good to have a photograph of the wine bottle in the menu, but nine times out of ten, the wine does not look good or enticing. Red wines end up looking black and white wines end up looking green. However, I can teach you in this column just how to get over this problem.
The first item to remember is to turn off your flash, because to photograph liquids in bottles front lighting is no good – it takes what we call back lighting, so that the light passes through the bottle on the way to the camera.
If you have an off-camera flash, this is the time to use it. With your DSLR you can view all your photographs, and check that the flash burst is actually going through the red wine in particular. I have seen us pour half the wine out (into drinking glasses – which were used later of course) and top up with water, to get the correct color of the wine. Naughty, I know, but it is the end result that matters.
So what do you do if you haven’t got an off-camera flash? Well, it is still possible to get a good photograph. What you have to do is get the light source behind the wine. Window light can work well here and set the camera exposure details for the front of the bottle. In this way, the back light ends up two to three stops brighter than the front light and will penetrate the wine in the bottle. Be ready to pour out some red wine again if it is still too dark!
If needs be, you can put some foil on the back of the glass to reflect some front light back through the wine.
Glasses of wine work exactly like the bottles, though you can usually penetrate the wine in the glass without dilution.
So to recap:
Backlight all wine, and be prepared to dilute if the color is still too dark.


