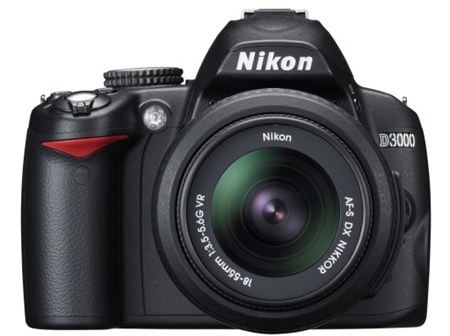
My 11 year old daughter asked me to show her how to use my camera. I agreed, but did nothing. Children’s enthusiasm does wax and wane, so hence my tardiness. The desire may have gone by the next week. However, now on the third week and getting exasperated mutterings from daughter I decided to acquiesce.
Teaching children anything can be a difficult task, but my “almost” teenager is now old enough to understand concepts and physics in particular. Why physics? Because cameras all obey some very simple physical laws, no matter how many pixels are stored inside.
Despite all the image stabilization trickery, the first lesson is merely on handling the camera to avoid camera shake. Using supporting tricks by leaning on a pole or setting the camera on a table top.
The second lesson is focusing for a sharp picture. Now I know 99 percent of digital cameras have Auto-Focus (AF), but it is amazing just how many weekend photographers get ‘soft’ pictures. This is generally when taking photographs of couples, where the focusing eye is looking between the heads and focusing on some point in the far distance. The differences and the ways to correct any problems can be demonstrated at the time, and the child becomes proficient at managing the factors.
Light and lens is a good way to start showing the novice that the camera is really just a container trapping the external light. The larger the aperture, the more light gets in. That is relatively easy for young minds to grasp, but the reverse numbering of the f stops is a bit of a hurdle.
Shutter speed is also an easy one, with the longer the shutter stays open, the more light gets in.
Now the temptation is to leave it there and just go play with the mode controls, but I believe that by giving the child a solid grounding in the basics, makes for a better understanding of “painting with light” as photography is often called.
By handling the two variables of aperture and time individually, you can demonstrate the different results – thank goodness for the instant gratification that today’s digital cameras will give you. I also found that by using aperture priority when playing with shutter speed and shutter priority when playing with aperture it made it such that the novice was only required to understand one variable at a time, by letting the camera do the rest.
It was only after that grounding in the basics did I get her to look at the modes, and Little Miss could see what the different modes were actually doing. To stop a railway train use a fast shutter speed. To give me as much detail as possible, then a slow shutter speed will work best.
If the day is overcast, then open up the aperture to let more light in. If photographing on the beach with bright light everywhere, then cut down the light entering the camera by closing the aperture. Remember again that the aperture numbers are the reverse of what you would intuitively expect. F4 is a large aperture, while f 16 is a smaller aperture.
And whilst I know that modern digital cameras can always give you an image especially when in ‘Auto’, I am trying to get my daughter to look beyond the camera being in charge, to the photographer being in charge.
It is important for your child to understand that good photographs are ‘made’, they just don’t happen. To sparkle up their shots, look for points of interest to include in the viewfinder. Then work out how to really use that point of interest in the shot. This may require shifting position, but is worthwhile.
Finally, there is the vexed question around ‘selfies’. Narcissism is not an admirable feature in our society. I will let my daughter take her own without me!
 |
 |
 |


