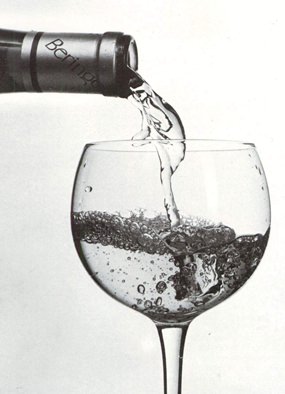
While most amateur photographers look for live models to photograph, one area of photography that can teach you creativity and lighting is Still Life photography.
This is an area where you will need time, and much more than you would imagine. The ability to position and light a subject to produce a pleasing result can fill up an entire day. In fact, the pro shooters can take a couple of days to get a still life shot just right. That’s right. A couple of days!

You see, there are so many aspects to be covered in still life photography. It is not just a case of placing the subject on a sheet of paper and pushing the button. Still life photography teaches you every important aspect of the artistic side of photography, as well as honing up your basic photographic skills.
The first great thing about still life shots is the subject doesn’t complain and tell you to hurry up and “Is my make-up smudged?” You can also just pick up the subject and move it in any direction to suit the shot. Try that with a live model! Oh yes, there are many advantages in having a silent subject!
Let us begin with lighting. The secret to all still life shots is to have two light sources. This can be daylight plus flash, two flashes, electric (tungsten) lights, daylight and a mirror – but you need two. The concept is one to basically light the subject and the other to light the background.
Lighting the background isolates the subject from the background and makes your subject the “hero” in the shot.
The other secret in the lighting is to produce a diffused light source. With an undiffused light, you will get far too many distracting sharp shadows, which with small table-top objects can ruin the overall effect. You can diffuse your lighting by shining it through some scrim cloth, transparent net curtain material or through some frosted plexiglass – the sort of material they have over fluoro lights, for example.
The next important item in still life photography is your own eye. You will find there are many books on the subject, but what you have to do is to look at your table-top and arrange the items in a manner that is pleasing to your eye. Do you want them overlapping, or at some distance from each other? Generally there is one dominant item – bring it to the foreground and then arrange the supporting items after that.
Having got that far and you are now pleased with the composition, you then have to look through your camera. Ayee! It doesn’t look the same as it did with the naked eye! That is because of the differences between the lens and your eye’s focal length. You now have to look through the camera and adjust the table-top items to produce the pleasing composition you saw with your own naked eye. Yes, this takes time, and more than you first thought!
So you now have the composition – you have to light it. This is where daylight or tungsten light becomes easier than flash – at least with the sun’s (filtered) rays or diffused tungsten you can see what you are going to get. (In the pro studio, the flash units have tungsten “modelling” lights so that you can get the idea of how the flash will illuminate the subject, before popping the shutter.)
Generally, I light the background first, then bring in the foreground (subject) lighting, carefully noting “spill” of one light source into the area of the other. Again, this can take hours! In fact, you can change the whole look of a table-top scene just with the balance of lighting used.
Remember too, that the exposure settings used in the camera depend upon the foreground lighting (not the background), and for most situations (but not all) the background can be brighter than the foreground, to “wash” it out a little. But again this is experimentation.
No, in still life photography it is not easy to get the result you want, even though it sounds straightforward. Perhaps it is easier to help the model fix her make-up after all!


