We are in the ‘automatic’ era. We drive automatic cars. We have automatic gate openers and remote controls on our television sets, so we don’t even have to get out of the armchair. And when it comes to photography, slip the camera into “auto” mode and you ‘automatically’ get reasonable photographs. Note: I did not say “great” photographs, but if you want to get great photos take the camera off the ‘auto’ mode.
Now the camera manufacturers say that this is not necessary. Today’s cameras are smarter than we are, etc etc etc. You can twirl a knob, or select from a pull-down menu, the “portrait” mode or the “action” mode, and let the camera do the rest. That is all very fine, but you will get the portrait, or the action, that the camera ‘thinks’ is right. Not what you necessarily want, and there’s a big difference. You have a brain – it doesn’t.
In photography, there are really only two main variables, and after you understand them and what they do to your photograph it becomes very simple.
The first thing to remember is that the correct exposure is merely a function of how large is the opening of the lens and how much time the shutter is left open to let the light in. That’s almost it – that is photography in a nutshell. No gimmicks or fancy numbers – a straight out relationship – how open and for how long – this is known as the “Exposure”.
Now I will presume, for the sake of this exercise that you have an SLR and use it in the automatic, or “Programme” mode. Let’s go straight to the “mode” menu and look up “A” or “Aperture Priority”. In this mode it means that you can choose the aperture yourself, and the camera will work out the shutter speed that corresponds to the correct exposure. Still simple.
So let’s play with this facility to give you some better pictures. Select “A” and then look at the lens barrel and you will see the Aperture numbers, generally between 2.8 and 22. To give you a subject with sharp focus in the foreground and a gently blurred background, you need to select an aperture around f2.8 to f4. Hey! It was that simple. To get those “professional” portrait shots, with the model’s face clear and the background all wishy washy, just use the A mode and select an Aperture around f4 to f 2.8.
Now, if on the other hand you want everything to be nice and sharp, all the way from the front to the back, like in a landscape picture, then again select A and set the lens barrel aperture on f16 to f22. The camera will again do the rest for you. Again – it’s that easy!
Flushed with creative success, let’s carry on. The next mode to try is the “S” setting. In this one, you set the shutter speed and the camera automatically selects the correct aperture to suit. Take a look at the shutter speed dial or indicator and you will see a series of numbers that represent fractions of a second.
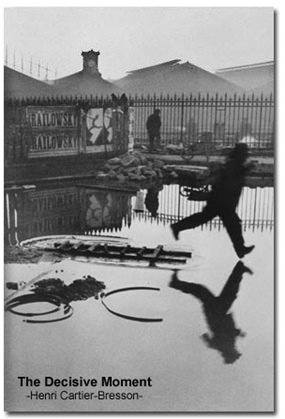
First, let’s “stop the action” by using a fast shutter speed. For most action shots, select S and set the shutter speed on around 1/500th to 1/1000th and you will get a shot where you have stopped the runner in mid stride, or the car half way through the corner or the person bungee jumping. Yes, it’s that easy.
So this week you have learned that to get a good portrait shot use the A mode and set the aperture on f4 to f2.8 and forget about the rest of the technical stuff. Just compose a nice photograph and go from there. (Do remember to walk in close however!) To get a great landscape shot, again use the A mode and set the aperture at f16 to f22.
Finally, to stop the action, choose the S mode and around 1/500th of a second and you won’t get blurry action shots ever again.
Certainly there are other aspects to good photography, but master the A and S modes and you will produce better pictures.
 |
 |
 |


