One of the lessons I learned many years ago from a well respected professional
Thai photographer (Tom Chuawiwat), was that the client actually paid you to
learn the craft. You could try all kinds of ideas while you were carrying out
their assignments. Not all of them worked, but by presenting a different view,
as well as the standard one, the client was impressed, while you, the
photographer learned a trick for the next assignment for somebody else.
Now lighting is one of the main variations you can go for.
Since photography is almost by definition, “Painting with Light”, it stands to
reason that the different light you use can produce a different picture. The
great celestial lighting technician that supplies the sunlight is not the only
form of illumination these days.
The weird thing about the different light sources is that
they all impart a different color to your photographs. This color shift or color
bias is not necessarily obvious to the naked eye - but the camera sees it and
records it. After all, the camera never lies, does it?
The first and most obvious difference is in the early morning
and late afternoon lighting. The morning light has a certain “coldness” to it
and imparts a blue hue to the overall photograph. The late afternoon we call a
“warmer” light and gives a warm almost “orange” glow to any item in the shot
receiving the sun’s rays.
Neon lighting that we all work under is not “white light”
either. In fact, if you go and look at any shots you have taken where neon is
the only light source you will find a certain “green” glow throughout the photo.
Another very common light source is the standard house type
light bulb. This is again another very “warm” light and any photographs taken
under incandescent (tungsten) bulbs will have an orange cast through them. It is
the knowledge of these variations that you can use to your advantage.
The environment is also important. My first photographic
studio was in a large building which had its own theatre for marketing
activities. The theatre stage had all the lights you could imagine, footlights,
overhead lights, spots, flares, everything. With all the theatre’s tungsten
lighting, I used no flash, but compensated for the color shift by using blue
gels over the theatre lights. Actually I had too much light, but it was all part
of the learning curve.
My next studio was in a large waterfront building that had
been a warehouse. I rented an area and then I painted everything white. Floors,
doors, walls, windows. I had decided that I wanted to be able to use small
apertures, so I needed as much light as I could get. By this stage I had also
graduated to multiple flash units, so I had lighting that would have brightened
up the dark side of the moon. I could shoot at f32 easily with my
Broncolor flash heads. There was only one problem. I could not get sufficient
shadow to produce a good 3D effect. I was getting flat 2D pictures. I resorted
to making huge flats (walls) which were painted matt black to try and get some
shadow. The results were better, but the lighting was still not where I wanted
it to be.
In my third studio, I used what I had learned from the first
two and I painted the entire studio black - floors, doors, walls and windows.
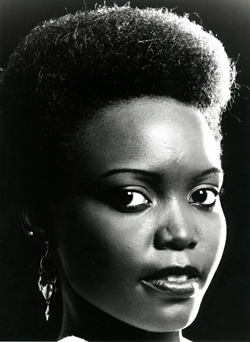
Now I could get good shadows, show form and even shoot mysterious images. I
called this stage in my photographic career ‘painting with dark’.
Dark shadows allow the viewer to imagine what is being
hidden. Your photograph “hints” at something and the viewer’s mind does the rest
from there. This is used to great effect in ‘glamour’ photography (as opposed to
pornography, by the way).
I found that it was much easier to begin with total darkness
and then add the lighting I wanted (or needed) to produce the effect. I could
gain complete control over the lighting, with no stray bouncing light to
complicate and confuse, as had been the problem with my white studio.
Try some different ambient light this weekend.

